
If you’re asking about how to set up a proxy on Chrome, this article is for you. Dive in to learn how proxies can be configured on various computer systems.
You’re not new to the internet but lately, you hear people talk about identity theft, hacked accounts, and more. You get worried and feel that you need extra protection. So you get a proxy server address but unfortunately, you don’t know how to set it up for use on Chrome. In this article, we will go through the process of setting up your proxy server for use on Google.
Does Chrome Have Proxy Settings?

No, Google Chrome doesn’t have proxy settings. When you go to proxy settings on the Chrome Settings tab, the link will take you to your computer’s system settings. Therefore, Chrome uses your computer’s proxy settings.
How to Setup a Proxy on Chrome for Windows?
Windows 8 or 10
If you have a Windows 8 or 10 computer, here are step-by-step procedures you can take to configure a proxy on Chrome.
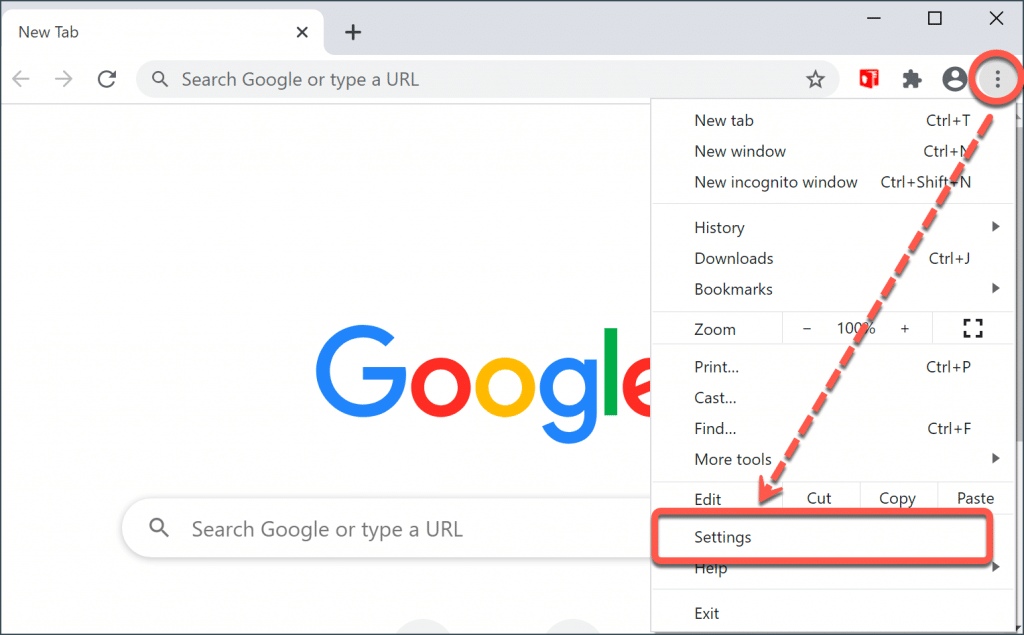
Step 1: Go to browser settings on your Chrome browser by clicking the three dots at the top right side of your computer
Step 2: Tap “Settings” from the drop-down menu
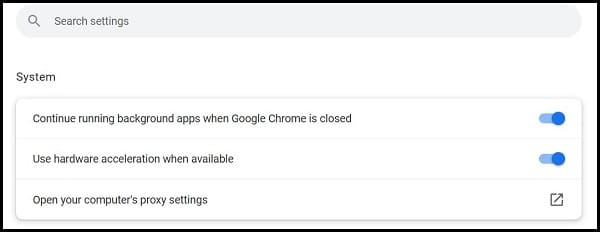
Step 3: Click on “System” on the left side of your screen
Step 4: Tap “Open your computer’s proxy settings”
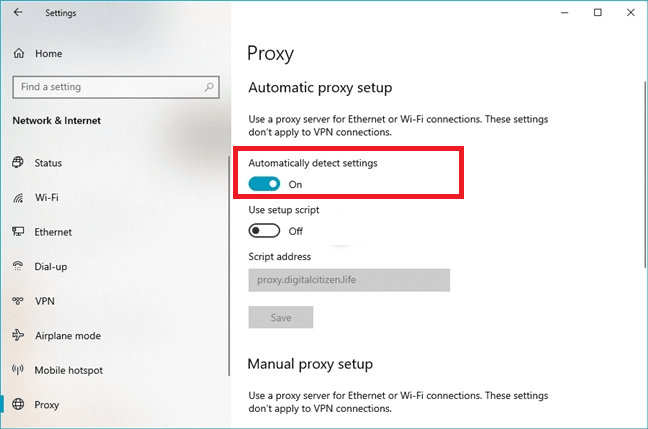
Step 5: Your system’s proxy settings will appear under the Network and Internet Settings tab on your Windows 10. By selecting automatic setup, your system will naturally detect proxy settings. You can also use the script option to set up your proxy by entering the script address and saving it.
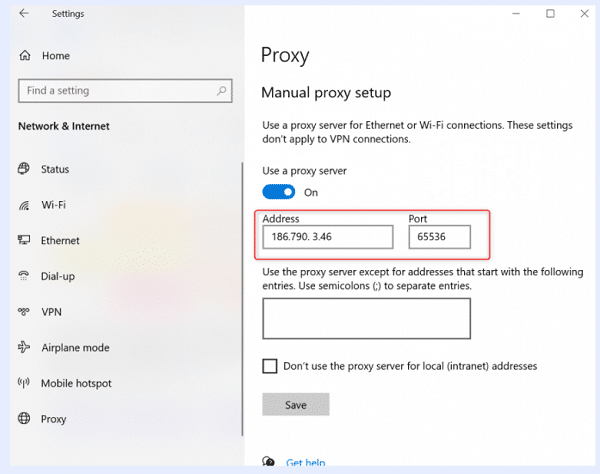
Step 6: To manually configure your proxy settings, open “Manual proxy setup” and then enable the “Use a proxy server” tab.
Fill in your IP and port number then save. Enabling “Use the proxy server except for” allows you to enter web addresses to which you prefer to have direct access. You can also choose to have direct web access to your web server by enabling “Don’t use the proxy server for local addresses”.
Step 7: Thereafter, a prompt may come up when opening a web page asking for your proxy credentials. You will be good to go once you have provided them.
Windows 7 or Older
Do you have a Windows 7 or older computer? You can still configure your IP through the following easy steps.
Step 1: Press the “Menu” button on your Chrome browser
Step 2: Click “Settings”
Step 3: On the search tab, type “proxy” then go to “Open your computer's proxy settings”

Step 4: The “Internet properties” tab will appear on your screen. Open “LAN settings” under the “Connections” tab
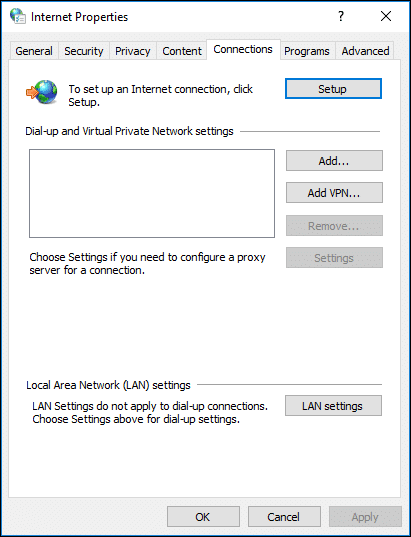
Step 5: Tick “Use a proxy server for your LAN”. Fill in your proxy’s IP and port number then click “OK”.
You may be prompted to enter your proxy credentials before surfing the internet.
How to Setup a Proxy on Chrome for Mac?
If you’re using a Mac for web browsing, here are the steps needed to configure a proxy on Chrome.
Step 1: Tap the three dots on the top right end of your Chrome browser to get to browser settings
Step 2: Select “Settings” then scroll down and go to “Advanced”

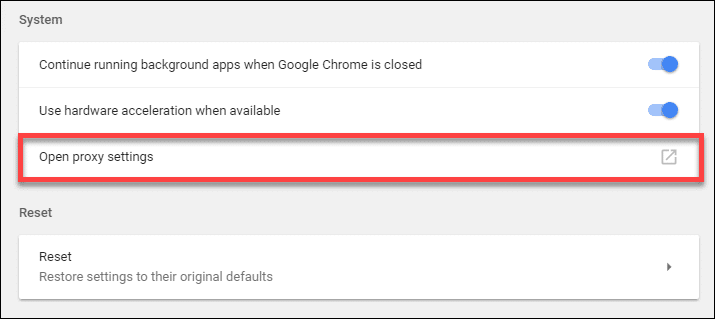
Step 3: Under the tab ‘System”, choose “Open proxy settings”
Step 4: Enter the IP address and port number
Step 5: Click on the “Secure Web Proxy” tab and enter your IP details again before authenticating your login details
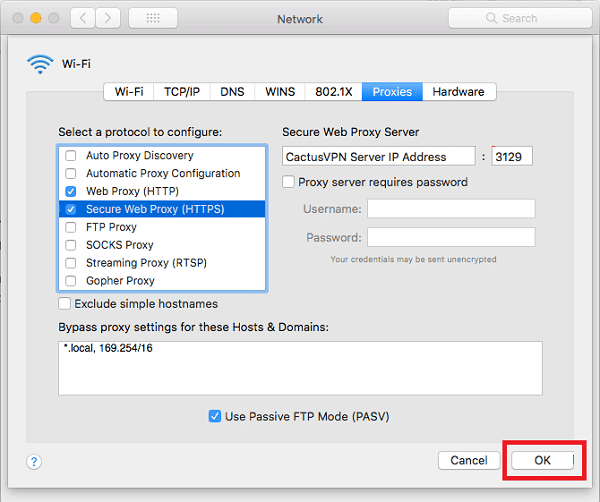
Step 6: Press “OK” to save your proxy settings
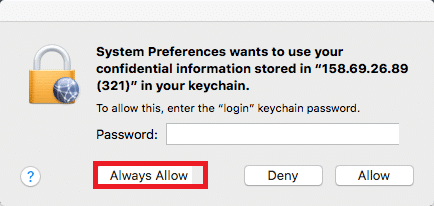
Step 7: Once in a while, you may be prompted to enter your login credentials. However by selecting “Always allow”, you won’t have to go over the process again.
Step 8: You may also be required to put in your username and password when accessing the internet for the first time after setup.
How to Setup a Proxy on Chrome for Linux?
Follow these steps when configuring a proxy on Chrome for your Linux system.
Step 1: On the settings tab, select “Network proxy”. Press “Automatic” if you have already installed it on your computer. Or, select “Manual” to configure the settings manually.
Step 2: From the provided list pick your proxy server’s protocol
Step 3: Enter your proxies hostname or IP and the port number
Step 4: Exit from the tab to save your proxy settings
What Are Some Good Proxies for Google Chrome?

A good proxy will hide your identity while browsing thereby boosting your security online. There are various types of proxies in the market. Below is a list of some of the best proxies in the market based on type.
Residential Proxies
These are among the best proxies in the market as they are more secure and stable. The residential proxies below are among the most secure in the market.
Private Proxies
A private proxy is not shared and can only be used by one person at a time. You have full control over its use and it increases your anonymity. Here are some private proxy servers you can look at.
Mobile Proxies
Mobile proxies are also the best choice to increase your level of anonymity, but they are relatively expensive. Here are some great mobile proxies to check on.
Conclusion
Setting up a proxy for Chrome browsing is an easy and simple process. Remember that Chrome doesn’t have its own proxy settings. It relies on the settings on your computer. Therefore, make sure that you follow the described methods herein to continue enjoying the internet but with more security.


