If you're looking to improve your product photography, you've come to the right place. In this blog post, we'll talk about product photography services, choosing the right background, choosing the right lighting, using a tripod, and taking a lot of pictures.
We'll also discuss how to retouch your product photos and make them look their best. Follow these tips and you'll be on your way to taking amazing product photos!
Product Photography Services

If you're selling products online, chances are you'll need to take some photos of those products. And if you want to make sure your products look their best, it's worth hiring a professional product photographer.
Product photography services can be found all over the internet, and they'll usually include everything from choosing the right background to taking the photos themselves. Look for a photographer that has experience with the type of product you sell.
If you sell makeup try beauty product photography services, and if you sell clothes look for fashion product photography services. This way you can be sure that your product photos will look amazing.
Choose The Right Background
The background of your product photo is just as important as the product itself. You want to make sure the background compliments the product and doesn't distract from it. A plain white background is always a good choice, but depending on your product, you might want to get creative with the background.
If you're selling jewelry, for example, you could use velvet fabric as the background. Just make sure the background is appropriate for your product and that it makes the product pop. The background should be simple and uncluttered so that it doesn't take away from the product itself.
A light-colored background is usually best, as it will make the product stand out. You can find backgrounds online or in photography stores. If you're using a professional photographer, they may have some backgrounds that you can use as well.
Choose The Right Lighting
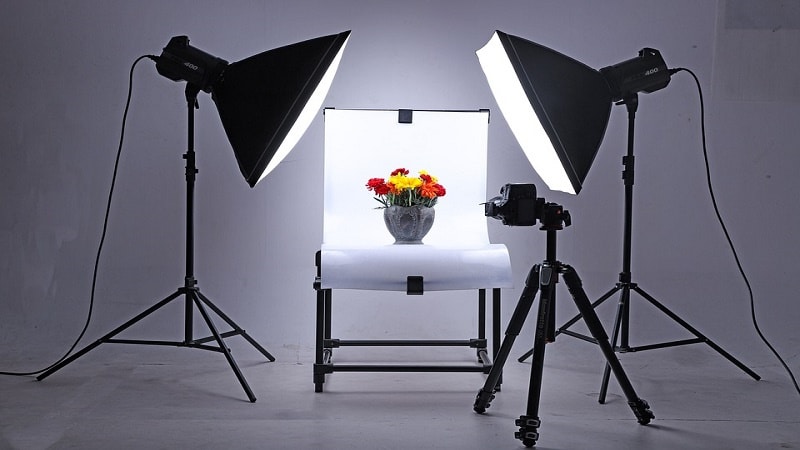
Lighting is another important aspect of taking great product photos. Natural light is always best, so if you can take your photos near a window, that's ideal. If you're using artificial light, make sure it's not too harsh or bright. You want the light to be soft and diffused so that it doesn't create any harsh shadows.
If you have a lot of light coming from one direction, you can use a reflector to bounce some of that light back onto the product. This will help to fill in any shadows and make the product look more evenly lit.
Use A Tripod
Using a tripod is important for taking sharp, well-lit photos. If you don't have a tripod, try to find something else that you can prop your camera up on so that it doesn't move around too much when you're taking the photo.
Even the slightest movement can make the photo blurry, so it's important to keep your camera still. If you're using a professional photographer, they will likely have a tripod that they use for taking product photos.
Take A Lot Of Pictures
When you're taking product photos, it's always best to take more than one. This way you can choose the best photo later on when you're editing. Take a variety of pictures from different angles and with different lighting setups.
The more options you have, the better. And if you make a mistake or don't like how one of the photos turned out, you can always delete it later. It's better to have too many photos than not enough. When you're choosing a product photo, there are a few things you want to consider.
The first is the composition of the photo. Is the product the focal point of the photo? Or are there other elements in the photo that are competing for attention? You want to make sure the product is the star of the show.
Retouch

Once you've taken a few photos of your product, it's time to start editing. There are a few things you can do in Photoshop to make your product photos look even better. The first is to adjust the levels. This will make the photo brighter and more contrasty.
You can also use the curves tool to adjust the color and contrast of the photo. If the colors are too bright or too saturated, you can use the hue/saturation tool to adjust them. You can also use the clone stamp tool to remove any unwanted blemishes or distractions from the photo.
And if you want to add a little bit of extra flair, you can use the dodge and burn tools to lighten or darken certain areas of the photo. Just be careful not to over-edit your photos, as they should still look natural.
Product photography is an important part of selling online. By following these tips, you can make sure your photos are looking their best.
And with great product photos, you'll be able to sell more products and make more money. So what are you waiting for? Get out there and start taking some great product photos!


