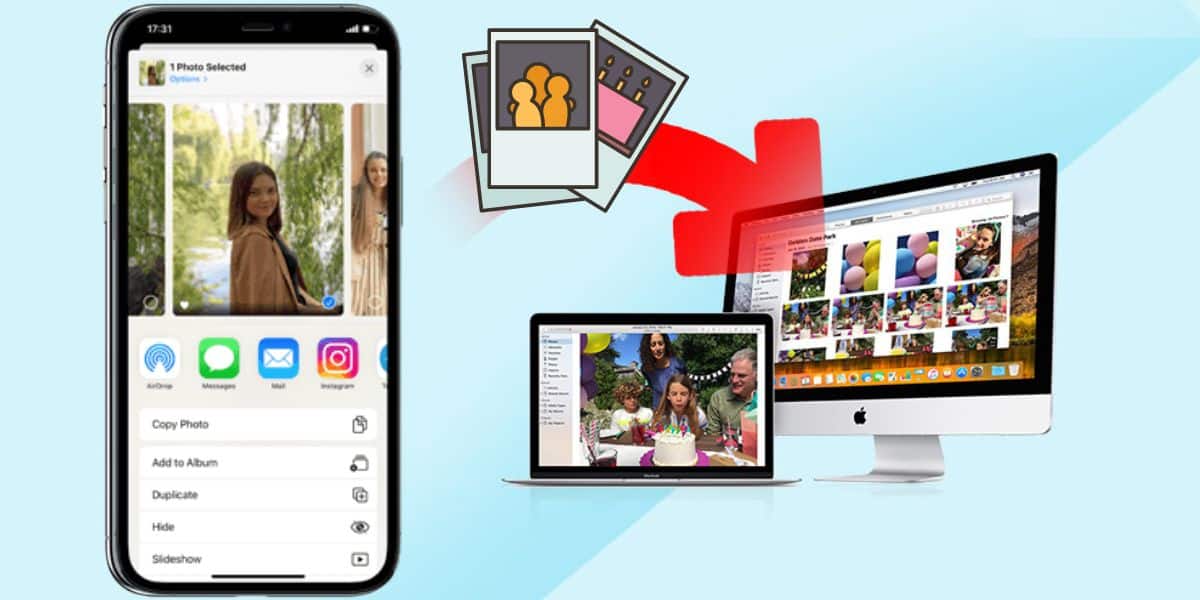
Do you need to backup your iPhone photos to your PC? Continue reading to find out how to transfer photos from your iPhone to your computer seamlessly.
The iPhone is a great device that makes it easy to take photos, but sometimes you may need to transfer photos from iPhone to the computer. There are many reasons why people need to transfer photos to the computer. The most common reason is that they have taken a lot of pictures with their iPhone and they want them on their computers so that they can view them on bigger screens or edit them with more powerful software.
Another reason is maybe you need to save your precious memories on the computer. So, you can back up your photo library so that you have multiple copies of your photos in case something happens to one or more of your devices.
So, whatever reason you have for transferring your photos from the iPhone to the computer, there are several ways to help your transfer.
How to Transfer Photos from iPhone to Computer with USB
The easiest way to transfer photos from iPhone to the computer is by using a lightning USB cable. The cable can be used for charging the iPhone, but it also serves as a way to transfer media files from an iPhone to a computer or Mac. Here are several ways you can use the USB for this transfer:
1. Use Windows Photos App
If you are having a Windows 8 or 10 computer, you can easily use this method because these Windows versions come with the Photos App already installed on the computer.
To do the transfer:
Step 1: You'll need to check and ensure you have the most recent version of iTunes installed on your PC.
Step 2: Go to [iTunes] and click to open.
Step 3: Touch the [Help] button.
Step 4: Scroll through and tap the [Check for Updates] button. Then follow the next instructions as guided by your computer to check the update.
Step 5: Connect the iPhone to the PC using the USB cable.
Step 6: If prompted to give permissions for the connection on your iPhone, click on the [Trust] button. Enter your passcode if prompted for the same then continue.
Step 7: On the computer, go to the [Photos] app. You can access it through the [Start] menu by clicking on the windows logo.
Step 8: Once in the Photos app on your PC, check through the upper tab for the [Import] option and click on it.
Step 9: Some may computers may, however, fail to show the import button. In that case, click any blank spot on the Photos app and the import button will be visible.
Step 10: Once you have clicked the import button, select the images you want to import and click [Import] again unless your computer directs you differently here.
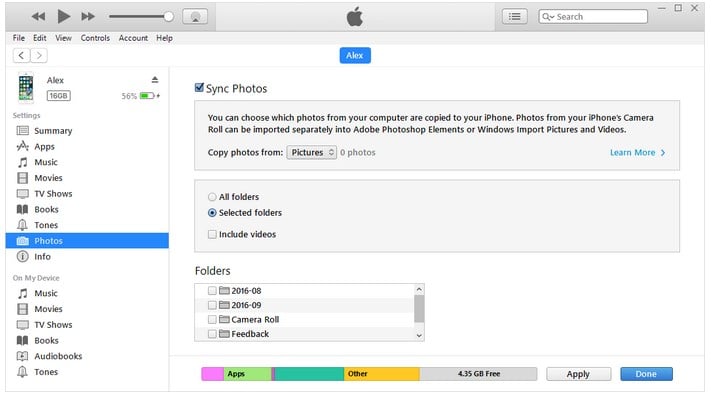
Step 11: Your files will begin transferring immediately after you click the [Continue] or [Import] button depending on the type of windows you have.
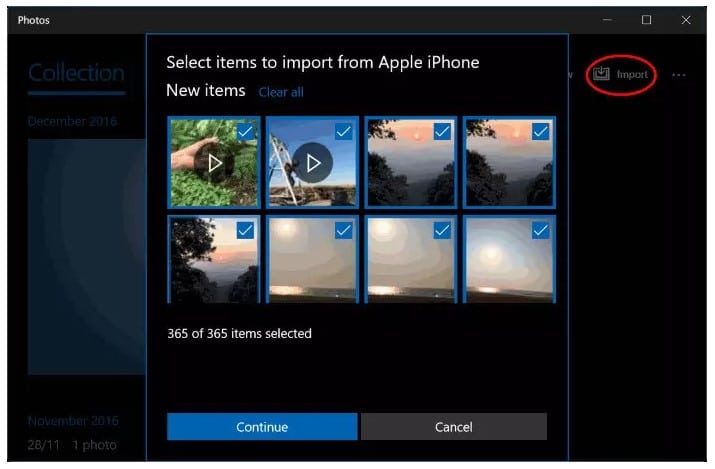
Step 12: Upon completion of the transfer, you can access the photos from the Pictures folder on your computer.
2. Use Windows AutoPlay
If you are using Windows 7 or an earlier version, you will not be able to transfer photos using the Windows Photo app because the older Windows lacks the app. However, you can use the Windows autoplay button:
Here's how:
Step 1: Connect your iPhone and the computer using the USB cable.
Step 2: An autoplay window will open automatically once your iPhone is connected to the computer.
Step 3: Search through and select the [Import Photos and Videos] button. You, however, need to ensure you choose the button, with Photos below the [Import Photos and videos] button.
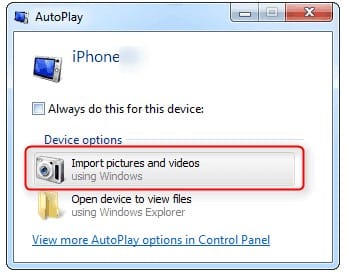
Step 4: All your photos will then be moved from the iPhone to the computer, straight in the pictures folder.
3. Use File Explorer/Windows Explorer
People using Windows 7 computers can also enjoy using this option for their transfers.
Step 1: Firstly, link your iPhone to the computer using the USB cable.
Step 2: Accept all permissions if prompted for any
Step 3: Open the [File Explorer] option.
Step 4: There should be an [Apple iPhone] labeled under the [This PC] button. Click on the [Apple iPhone] label.
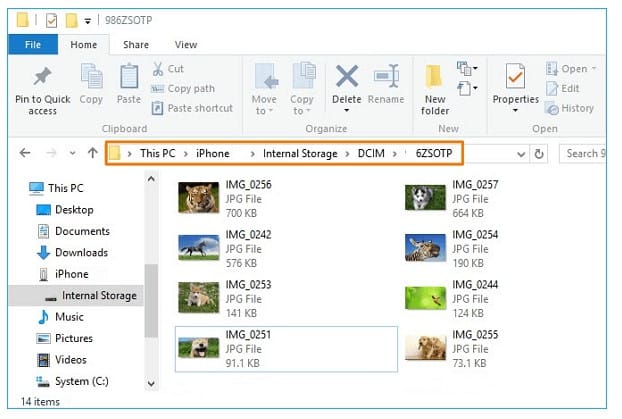
Step 5: Once you are into the [Apple iPhone] label, scroll through and select the [DCIM] folder.
Step 6: In the DCIM, is where you may find single or several folders named, 100CLOUD, 101CLOUD, 100APPLE, 101APPLE, etc.
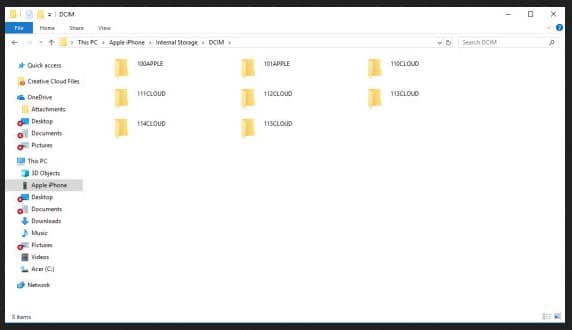
Step 7: If you will need to copy each of the folders stated above, click [Ctrl + A] then right-click on either of the folders and select the copy option.
Step 8: Open your [Pictures] folder on the PC and right-click any blank space to paste the copied folders. and that's it!
4. Alternative Method
Using the Windows Photos app is an easy way for users who don't have a lot of experience with computers. But sometimes, this method may fail for some users. In that case, you can try another option. here's is the alternative option you may want to try:
Step 1: Connect your iPhone to your Windows computer using the cable, and unlock it if prompted to permit the connection.
Step 2: Go to [This PC] on your Windows computer. Your iPhone is listed under [Devices and Drives].
Step 3: Right-click on your iPhone and select the [Import pictures and videos] from the context menu.
Step 4: If you want to change the default storage for these files on your PC, you can click the [More] link at the bottom of the screen page.
Step 5: Press the [Next] button. The computer will look for images and videos on your iPhone.
Step 6: Mark the items you want to import.
Step 7: Touch the [Import] button when you are ready to start the photos transfer.
How to Transfer Photos from iPhone to Computer without USB
The most common way to transfer photos from iPhone to a computer is to use a USB cable. You can connect your iPhone to your computer, and then you can open the photo management software on your computer. The software will automatically detect all of the photos on your iPhone and allow you to transfer them over easily.
However, sometimes you may not have a USB cable available and need another method for transferring photos from iPhone to the computer. The good news is that there are several other ways that work just as well!
These methods include:
1. By AirDrop
AirDrop is a wireless technology that allows you to transfer files from iPhone to computer without using a USB cable. AirDrop uses a Wi-Fi connection to transfer photos, videos, contacts, and more.
You can also use Airdrop to share files between iOS devices and Macs running OS 12 or later.
To use it:
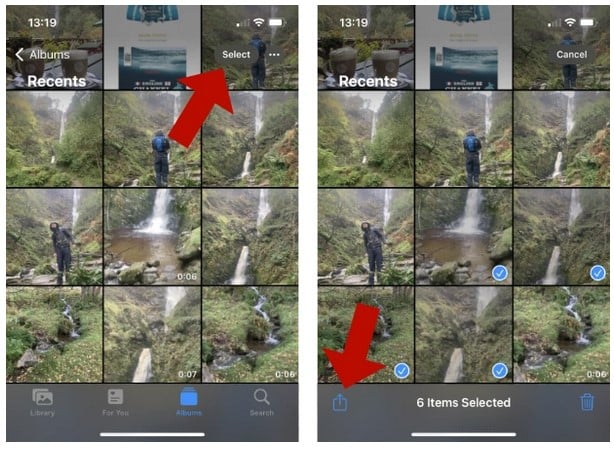
Step 1: Go to the [Photos] app on your iPhone.
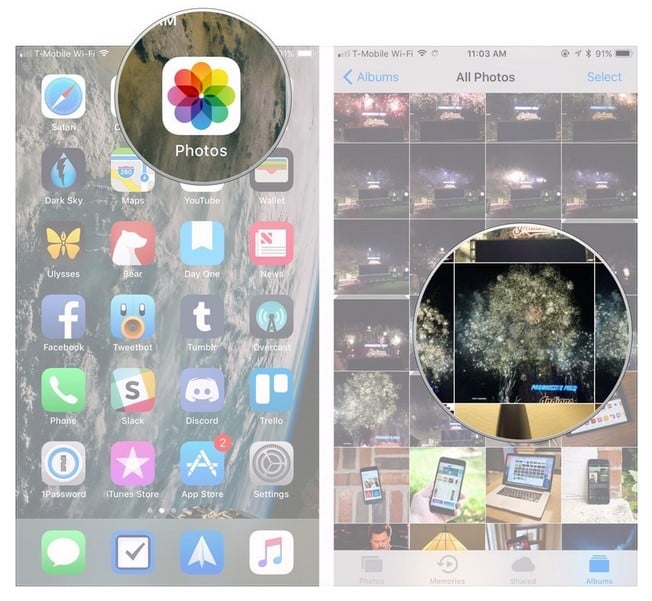
Step 2: Mark all the photos you'd like to share then click on the [Share] icon.
Step 3: Tap on the [Airdrop] option in the share menu.
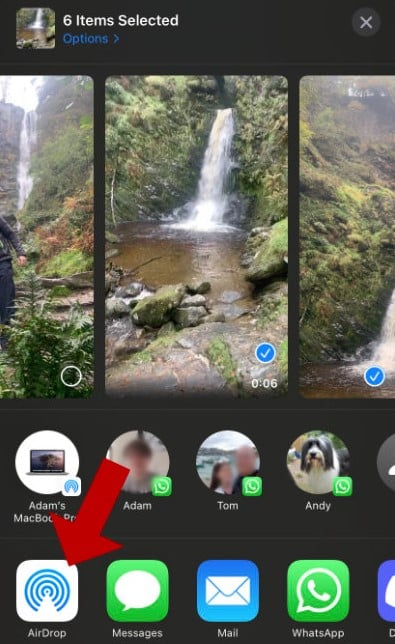
Step 4: Tap on your computer's name in the new window.
Step 5: Upon successful transfer, there will be a sent button below your computer's name.
Step 6: Click on the [Done] option in the upper-righthand corner on the Airdrop screen to exit the page.
Step 7: If your pc is not using the same iCloud account as the iPhone, you will need to click Save when the file turns up on your computer. If you are using one iCloud account, the pictures will be saved automatically.
2. By iCloud Photo Stream
Photo Stream does not use any space in your iCloud storage. The photos in Photo Stream will, however, be available for 30 days only. So the photos will transfer when your iOS device is connected to a network, preferentially a Wi-Fi network unless you have enabled the cellular data transfer option.
So you'll need to:
Step 1: Launch the [Settings] app on your iPhone.
Step 2: Click on your [Apple ID] on the upper side of the screen.
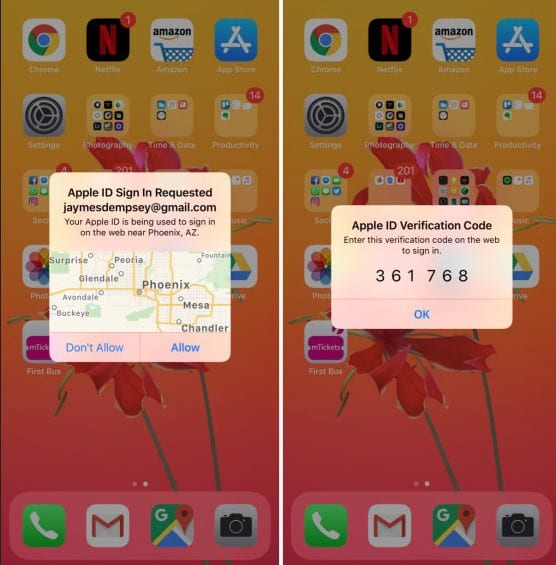
Step 3: Select the [iCloud] option.
Step 4: Tap on the [Photos] button
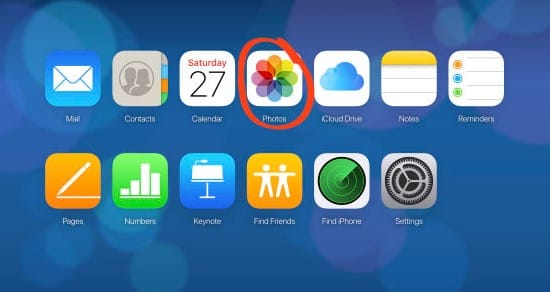
Step 5: Touch to switch on the toggle button on [My Photo Stream]
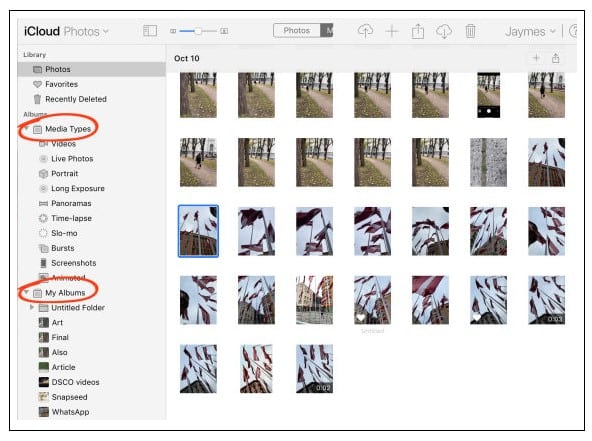
Step 6: In case you are using your MAC, open the [Photos] app, but on your computer, download iCloud for windows before taking any step.
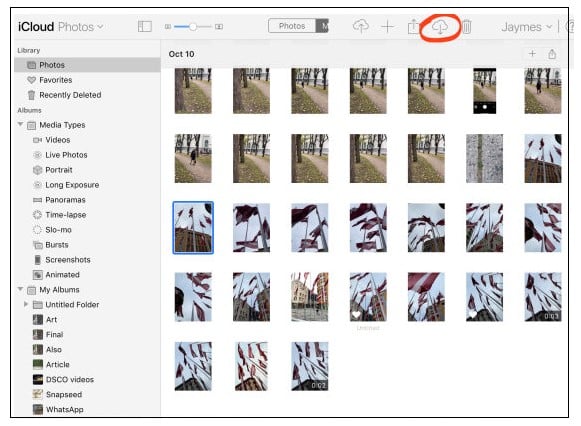
Step 7: Select [Preferencess] from the [Photos] menu.
Step 8: Click on the [iCloud] tab
Step 9: Mark the box next to the [My Photo Stream]
Step 10: Select the [Done] option. When you connect your device to Wi-Fi, your photos will be automatically added to Photo Stream. However, they will only be available on Photo Stream for 30 days, or until they have accumulated to 1000 images.
3. By iCloud Photos
Setting up iCloud Photos has no difference from setting up Photo Stream, except that iCloud will now store all your photos in the iCloud account.
On iPhone:
Step 1: On your iPhone, open the [Settings] app.
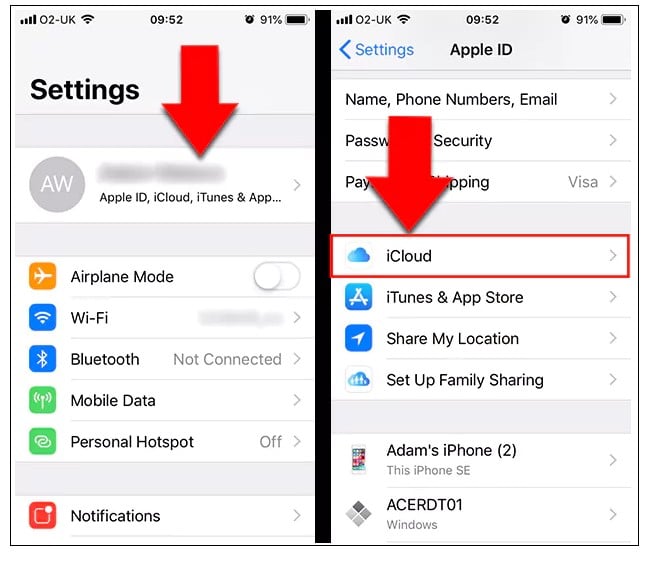
Step 2: Click on your [Apple ID] in the upper left corner of the screen.
Step 3: Choose the [iCloud] option.
Step 4: Click the [Photos] button.
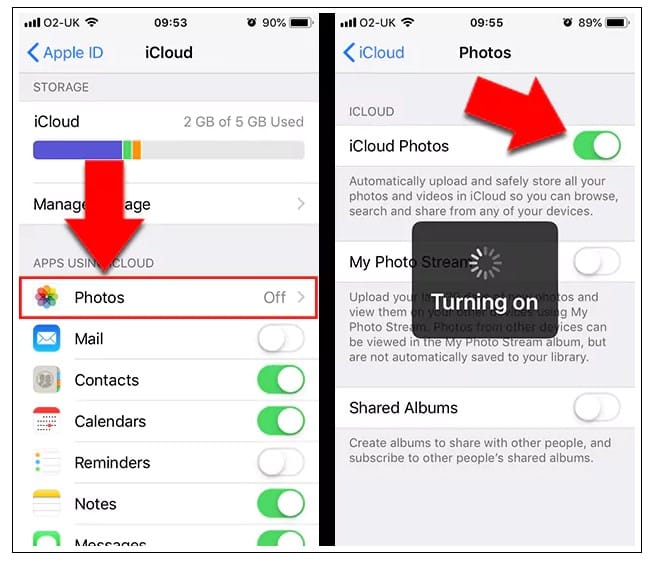
Step 5: Touch to turn on the [iCloud Photos] toggle.
On the MAC
Step 1: Open the [System Preferences] option by selecting it from the Apple menu in the upper left corner of your screen.
Step 2: Touch the [APPLE ID] button and sign in.
Step 3: iCloud should already be picked in the left-hand menu. Click on it if it isn't.
Step 4: Tick the [Photos] box and, if prompted, enter your computer's passcode.
All of the photos you take on your iPhone and add to your computer will now appear in both places. However, you should keep an eye on your iCloud storage because this will quickly exhaust it.
Why Can’t I Transfer Photos from iPhone to PC
If you are having trouble transferring photos from iPhone to PC, it is probably because of the new HEIF picture format.
With the release of iOS 11 and macOS High Sierra, Apple has introduced a new format for storing images called HEIF (High-Efficiency Image File Format). HEIF files are about half the size of JPEG files, so they take up less space on your device and make it easier to store more pictures. But they aren’t compatible with most photo editing software or photo storage apps.
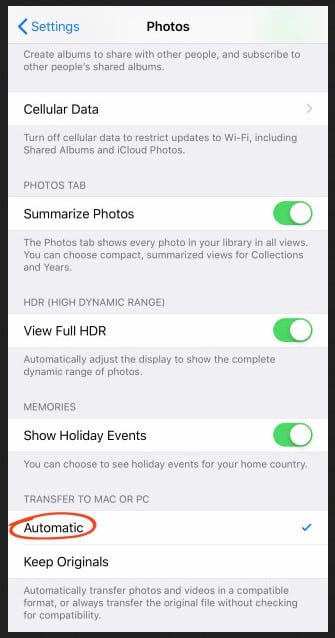
When exporting to your computer, make sure your iPhone automatically converts the HEIF photos to JPEGs.
To do it you should :
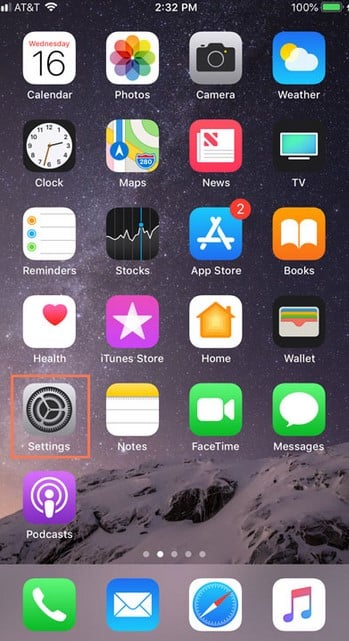
On your iPhone's Home screen, tap on the [Settings] app. Then, under [Transfer To Mac Or PC], tick the box next to [Automatic].
To go about this, here are more ways to convert HEIC to JPG on iPhone.
Conclusion
Transferring photos from the iPhone to a computer can be quite a challenge, but it doesn't have to be. In fact, there are several packages that cater to this very task, allowing users to transfer their favorite snaps in just a few clicks. All you have to do is plug your iPhone into your computer and choose the most favorable option for the transfer.
The bottom line is that there are many solutions to transferring iPhone photos to a Mac. Which one you ultimately choose will depend on your needs: which files you're transferring, which program you prefer, and whether or not you want to erase your iPhone first. Overall, there's a solution for everyone, so keep looking if the solution you find doesn't quite match your situation.


