The latest OS from Microsoft, Windows 10, has taken the digital world by storm. The latest features and looks have been universally liked. As a result, the majority of the population has upgraded to Windows 10 to access the latest features from the software-making-giant.
Get a VPN subscription
This is the first and the most important step while setting up a VPN. You could get a subscription from any reputed VPN service provider like ExpressVPN recommend by privacyenbescherming (in Netherlands). After subscribing ask them for your login credentials. These credentials will be used later on while connecting to the VPN.
Setting up PPTP VPN on your device
You should follow the steps given below to set up a PPTP VPN on your device.
- Click on the network icon present in the icon tray on the task bar.
- Choose “Network Settings”
- On the sidebar, you will find the option of “VPN”, select that option.
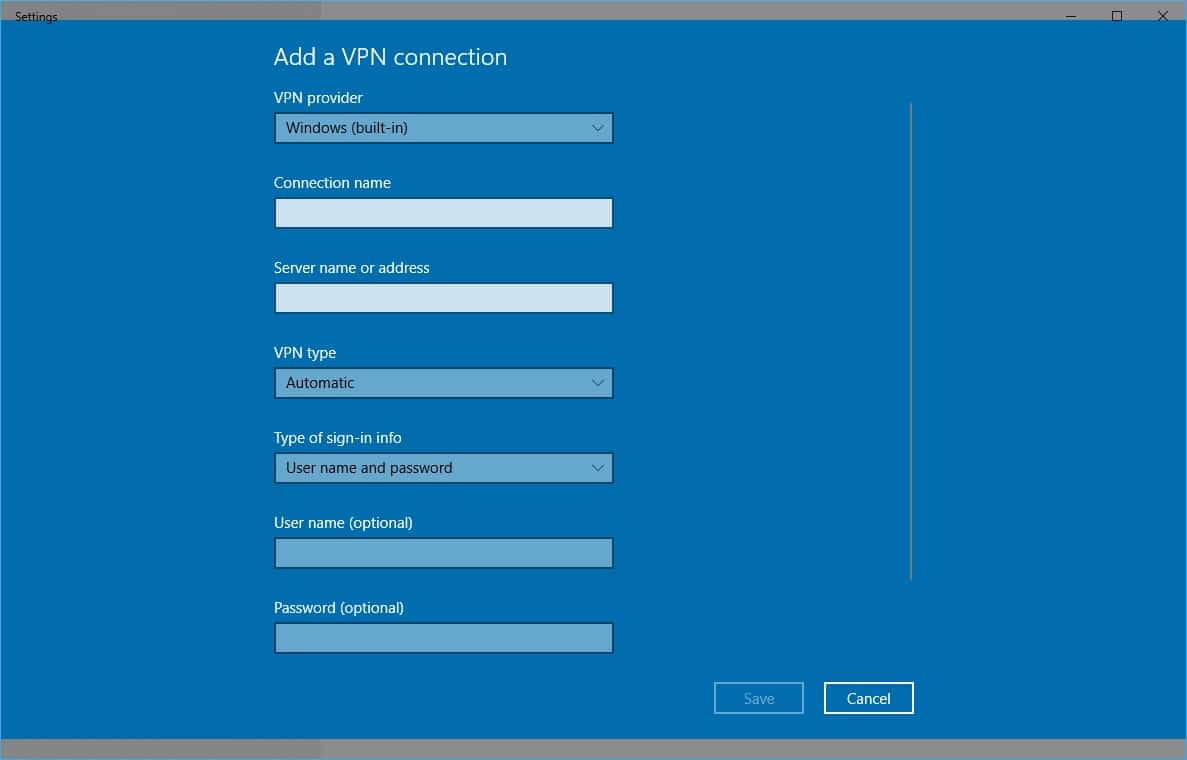
- You will come across an option “Add a VPN Connection”, after clicking the VPN option.
- Select the VPN type as “PPTP” and enter the credentials as provided by your VPN service provider.
- Click on the “Save”
Now you’re done! You have just set up a VPN on Windows 10! Just follow the steps given below to connect to the internet via the VPN, you just established.
- Click on the network icon located in the icon tray of your task bar.
- Locate the VPN profile, you just created and click on “Connect”.
Now, you wander into the world of unrestricted internet. With VPN, you keep your privacy intact and also, keep yourself anonymous on the web. Protection from the hackers and scammers increases multifold while connecting to the internet via a VPN server.
Set up an Incoming VPN on Windows
In the just concluded section, you learnt about setting up an outgoing VPN connection. In this section, we shall be learning about setting up an incoming VPN on your Windows 10 device.
Setting up an incoming VPN on your Windows device lets others connect to your computer remotely. This becomes important in cases where you wish to share important data with your employees located in a far off place.
Thus, let’s learn about setting up an incoming VPN on windows 10:
- Right-click on the network icon in the icon tray of the task bar.
- Choose, “Open Network and Sharing Centre”
- Now, on the left sidebar, you will find the option “Change adapter settings”. Click on that.
- Next, click on “File” and select “New Incoming Connection” from the drop-down menu.
- Now, pick the users to which you wish to grant access to your computer. Click on “Next”
- Then, put a check mark on “Through the Internet” and click “Next”.
- Choose the protocols that you wish to enable for this connection.
- Click on the “Properties” button and choose the “Specify IP addresses” Thereafter, enter the IP addresses that would not be used on your LAN. Then click on “OK” and then on “Allow Access”.
- Note down the Computer’s name. This name will be used by the client to connect to your computer.
- Configure your firewall to allow incoming Point-to-Point Tunneling Protocol (PPTP) connection for VPN.
Now, the incoming VPN is all set on your computer. You’re ready to accept any incoming VPNs.
Configure your router
Now, we need to set up the router using the following steps:
- Go to your router setting through your web browser.
- Either enable PPTP or create a forwarding port to 1723.
- Enable PPTP or VPN (pass-through setting), if allowed by your router.
Client setting
Follow the following steps to set up a VPN client:
- Right click on the network icon and select “Network and Sharing”
- Choose “Set up a new connection or network”
- Select “Connect to a workplace” and press “Next”.
- Choose “Use my Internet connection (VPN)”.
- Type in the VPN server IP address, you’re connecting to. Also, mention your desired connection name in the “Destination name” Then click on “Create”.
You have now set up a VPN client.
[masterslider id=”3″]
Connect to the VPN
Use the following steps to connect to the VPN service you just configured.
- Go to Start > Settings > Network & Internet.
- Select the “VPN” option present on the right.
- Choose the VPN profile and click on “Connect”.
Now, you’re done. You have successfully connected to the internet through a VPN connection, you can easily pick a VPN service from privacyforkorea, then You can connect to any website or service that you wish, even if you're in Korea.
End Note
Hopefully, all your issues relating to setting up a VPN on windows 10 have been resolved by now. However, in the case of any queries, contact us. We shall be happy to help.


